Are you curious about how to make delicious Bavarian Mints at home? I’m here to guide you through easy steps to create these silky, mint-flavored chocolates yourself.
Bavarian Mints are a classic treat that always bring a smile. I remember the first time I made them; the aroma of rich chocolate and refreshing peppermint filled my kitchen. They are surprisingly simple to prepare and look stunning on any dessert table.
What makes Bavarian Mints so special is their silky, smooth texture combined with a bracing mint flavor. With just a few ingredients, you can create a homemade delight that feels like a luxurious gift.
Whether for a holiday celebration or a special gift, these treats never fail to impress. I will guide you through easy steps to make perfect Bavarian Mints, so you can enjoy their decadent taste anytime. Prepare to delight in making your own signature candies!
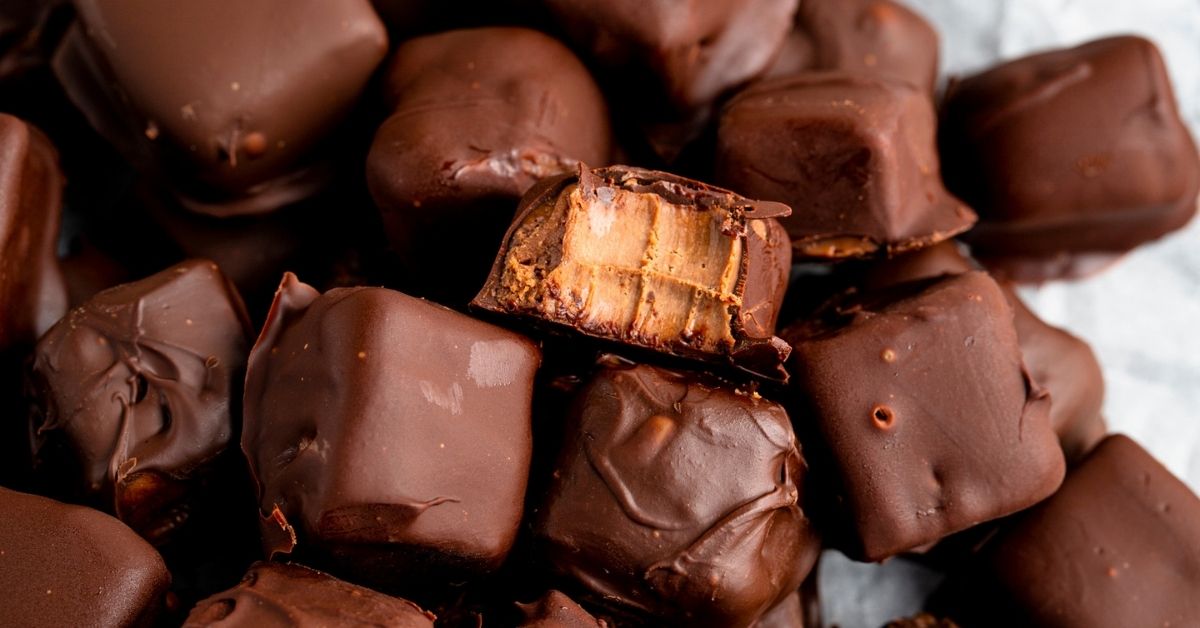
1. Bavarian Mints (Chocolate Meltaways)

Bavarian Mints are silky, creamy delights that melt effortlessly in your mouth, with a refreshing minty flavor wrapped in a rich chocolate shell. These easy-to-make treats are perfect for any celebration or gift, offering a decadent, homemade touch to your holiday table.
Read the Recipe: Bavarian Mints (Chocolate Meltaways)
2. Bavarian Mint Fudge
Bavarian Mint Fudge is a rich, minty chocolate treat that’s super easy to make and perfect for sharing. Simply melt chocolate and butter, then mix in condensed milk, peppermint, and vanilla before spreading into a pan and waiting for it to set—deliciousness in just a few simple steps!
Read the Recipe: Bavarian Mint Fudge
3. Bavarian Mints
Bavarian Mints are irresistibly smooth, creamy chocolate squares with a refreshing peppermint flavor, perfect for holiday treats or anytime you crave a sweet escape. This easy recipe combines rich chocolate with a cooling mint kick, all without needing a candy thermometer—just melt, mix, chill, and enjoy!
Read the Recipe: Bavarian Mints
4. Bavarian Mint Fudge [myrecipetreasures.com]
![Bavarian Mint Fudge [myrecipetreasures.com]](https://myrecipetreasures.com/wp-content/uploads/2017/11/IMG_5706-2.jpg)
Imagine biting into creamy, smooth Bavarian Mint Fudge, bursting with rich chocolate and refreshing peppermint flavor—it’s irresistibly delicious every time! This quick and easy treat is perfect for sharing with neighbors or enjoying during the holidays, and once you taste it, you’ll find it hard to stop eating!
Read the Recipe: Bavarian Mint Fudge [myrecipetreasures.com]
5. Bavarian Mints [www.countrykitchensa.com]
![Bavarian Mints [www.countrykitchensa.com]](data:image/svg+xml,%3Csvg%20xmlns='http://www.w3.org/2000/svg'%20viewBox='0%200%20488%20275'%3E%3C/svg%3E)
Making Bavarian Mints is a fun little adventure in the kitchen! You mix smooth fondant with a splash of peppermint and creamy evaporated milk, then combined it with rich dark chocolate, creating a luxurious treat that looks as elegant as it tastes.
Read the Recipe: Bavarian Mints [www.countrykitchensa.com]
6. bavarian mints

Bavarian Mints are a delightful treat made by melting semi-sweet and milk chocolate chips with a touch of butter, then mixing in sweetened condensed milk, vanilla, and peppermint extract. Once blended, the mixture is poured into a buttered pan, cooled, and cut into small, irresistible minty candies that are perfect for sharing!
Read the Recipe: bavarian mints
7. Bavarian Mints [www.keyingredient.com]
![Bavarian Mints [www.keyingredient.com]](https://www.keyingredient.com/uploads/media/3c/12/d0eccb61d2e26cc0336e126074c20896cf19.jpg?1560427388)
These Bavarian Mints are a delightful treat combining rich, semi-sweet chocolate with a refreshing peppermint flavor. Just melt together chocolate, butter, and condensed milk, then mix in peppermint extract and icing sugar before shaping into tiny bites topped with a dusting of icing sugar—perfect for enjoying after dessert with a cup of coffee!
Read the Recipe: Bavarian Mints [www.keyingredient.com]
8. Bavarian Mints Recipe

Bavarian Mints are a deliciously quick and easy treat made with rich milk chocolate, unsweetened chocolate, and a touch of peppermint for a refreshing twist. Just melt the chocolates with butter, mix in sweetened condensed milk and flavorings, then chill until firm before cutting into perfect little squares—a holiday hit everyone will love!
Read the Recipe: Bavarian Mints Recipe
9. Bavarian Mint Coffee
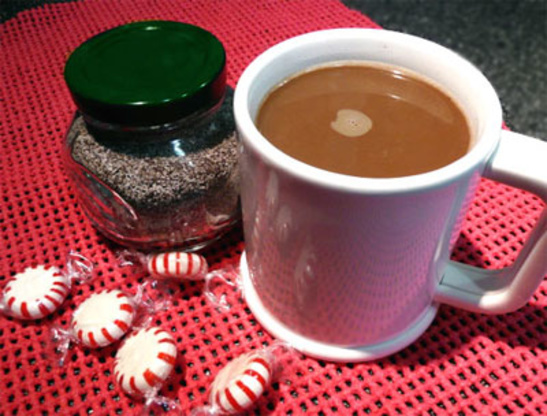
Enjoy a cozy winter treat with this delicious Bavarian Mint Coffee that combines instant coffee, cocoa, and crushed peppermint candies for a refreshing, festive flavor. Just mix the dry ingredients, store in a jar, and when you’re ready, stir 2 to 2½ teaspoons of the blend into hot water for a warm, minty indulgence!
Read the Recipe: Bavarian Mint Coffee